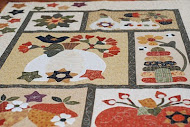
My gift to you this Holiday Season.
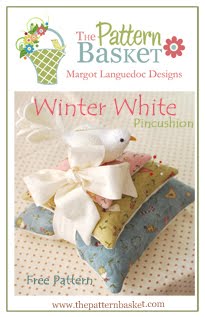
This easy-to-make and fun-to-give pincushion is
called Winter White.
I love to give homemade things and I know we all
live busy lives so I designed this pincushion with that in mind. Its super easy
and fast to make. The stores are filled with beautiful ornaments so I couldn’t
resist adding this little dove to my pincushion.
Winter White Pincushion
Pattern
Ingredients
One little clip-on bird or other
ornament
Three squares of Holiday
fabric 8 ½”, 6 ½”, 4 ½”
Three squares of
Creamy/white fabric
8 ½”, 6 ½”, 4 ½”
Creamy/white print for
the tie 3 ½” by 38”
Batting squares 8
½”, 6 ½”, 4 ½”
Poly stuffing and poly
pellets Craft size package
Step One - The Pincushion
Place the 8 ½” Holiday
fabric square on top of the 8 ½” square of batting, right side up. Quilt as
desired.
Once quilted place the 8 ½”
square on top of the 8 ½” creamy/white fabric, right sides
together. Using a walking foot, sew ¼” around the perimeter leaving a 2”
opening to turn right sides out. Before you turn the square right sides
out, be sure to clip the corners to get rid of the bulk, making sure you do not cut into
the sewn line. Now turn the square right sides out. Firmly stuff
with poly fill and plastic pellets to add weight. Hand stitch the opening
closed.
Repeat these steps with the fabric and batting
for the 6 ½” pin cushion and the 4 ½”pincushion.
Place them on top of one
another with the 8 ½” pin cushion on the bottom, the 6 ½” pincushion in the
middle and the 4 ½” pincushion on top.
Step Two - Tie
Fold the 3 ½” by 38” strip of creamy/white print
in half, right sides together. Sew ¼” down the side and on a diagonal
across both ends, leaving a 3” opening in the middle to turn right
sides out. Turn and stitch the opening closed.
Wrap the Tie around the
pincushions, and secure with a bow on the top and add your ornament.
From my sewing room to yours … I hope you enjoy this winter white pincushion!


.jpg)